How to setup Mercurial server on Windows/IIS
written by Germán Schuager on 19 Mar 2010
In this post I will enumerate the resources and the steps required to setup a Mercurial server under a Windows environment running on top of IIS 7.
This is not as straight-forward as it should be but it is not very difficult either.
You will need to download the following:
- Mercurial 1.5.1 http://bitbucket.org/tortoisehg/thg-winbuild/downloads/mercurial-1.5.1.msi
- Python 2.6 x86 installer http://www.python.org/download/releases/2.6/
- if you use another version of Python you will probably end up with a "Bad magic number" error, as pointed by Lloyd in the comments
- if you use the x64 version you will get some other error messages and hg will not work
- hgwebdir.cgi http://selenic.com/repo/hg/raw-file/ff2704a8ded3/hgwebdir.cgi
- IIS UrlRewriter module http://www.iis.net/expand/URLRewrite (optional but very recommended)
I will split the configuration steps into setting up the file system and configuring IIS.
Setting up the file system
1. Install Mercurial. I will assume the default install path: C:\Program Files (x86)\Mercurial
2. Install Python. I will assume the default install path: C:\Python26
3. Create a folder for your Hg web application. I will assume this path: C:\hg
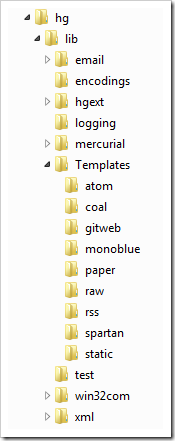
4. Create a subfolder called lib and uncompress the contents of the file C:\Program Files (x86)\Mercurial\library.zip into C:\hg\lib
5. Copy the folder C:\Program Files (x86)\Mercurial\Templates into c:\hg\lib
At this point you should have something like this:
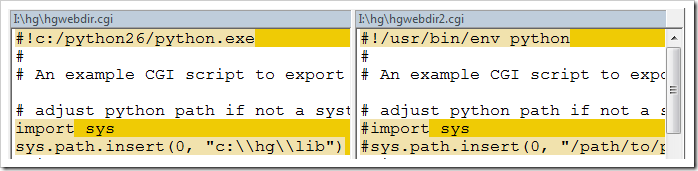
6. Copy the hgwebdir.cgi (link at the top of the post) file into your wep app folder root c:\hg and modify it so that it match your Python installation folder and your lib folder. Using my current path assumptions you should end with something like the one in the left of the following picture:
7. Create a folder named repos in c:\hg\repos. This folder will contain all our mercurial repositories. For testing purposed now we will create a test repository inside there; just run this from the command line "hg init c:\hg\repos\test" (this will create and initialize the test repository)
8. Create a file named hgweb.config at c:\hg\hgweb.config with the following content:
[paths]
/ = repos/*

[web]
baseurl = /hg
push_ssl = false
allow_push = *
here we are telling Mercurial basically 3 things: where are the repositories that it should serve, everybody can push, and it should allow pushes through non-secure connections (so we don't need to setup https)
Configuring IIS
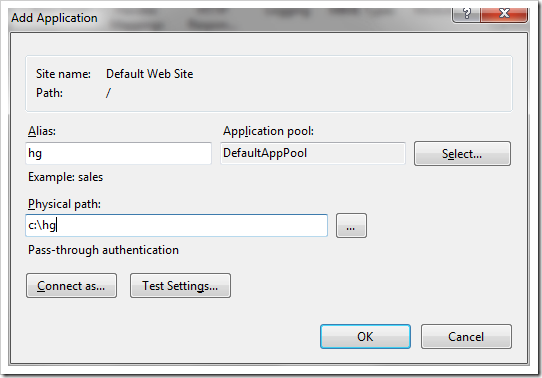
9. Add a new web application to your "Default Web Site", name it "hg" and assign "c:\hg" to its Physical path.
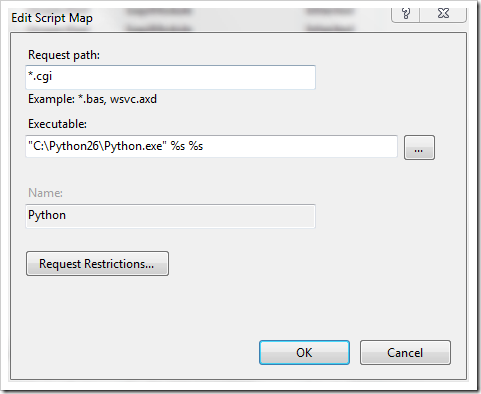
10. Now we need to configure our newly created app to be able to execute Python scripts. Click on the "Handler Mappings"
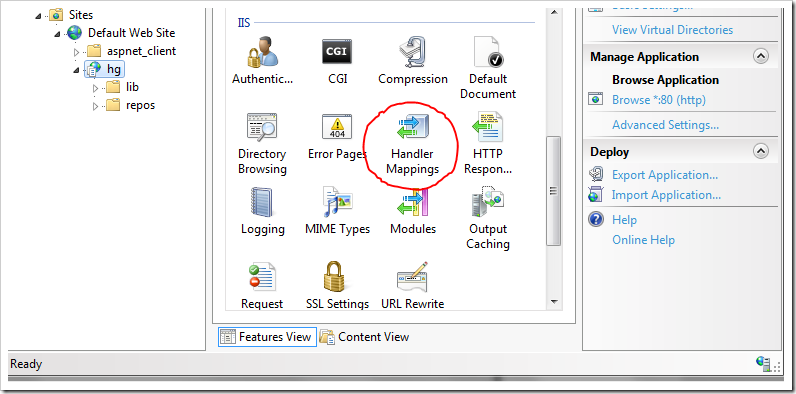
then in "Add Script Map..." from the right menu

and then enter the script extension and Python executable path as shown in the following picture:
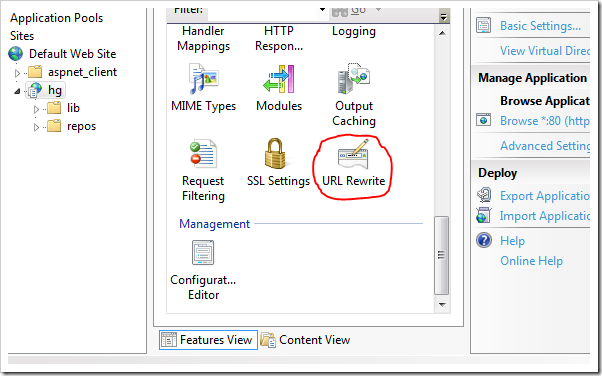
11. The final step is to configure Url Rewriter module correctly to allow us to use our repository with a nice URL like this: http://server/hg/test instead of http://server/hg/hgwebdir.cgi/test. For this you need to install the Url Rewriter module either using Web Platform installer or by manually doing so (link at the top of the post).
Once you have Url Rewriter installed, select it from you application Feature View:
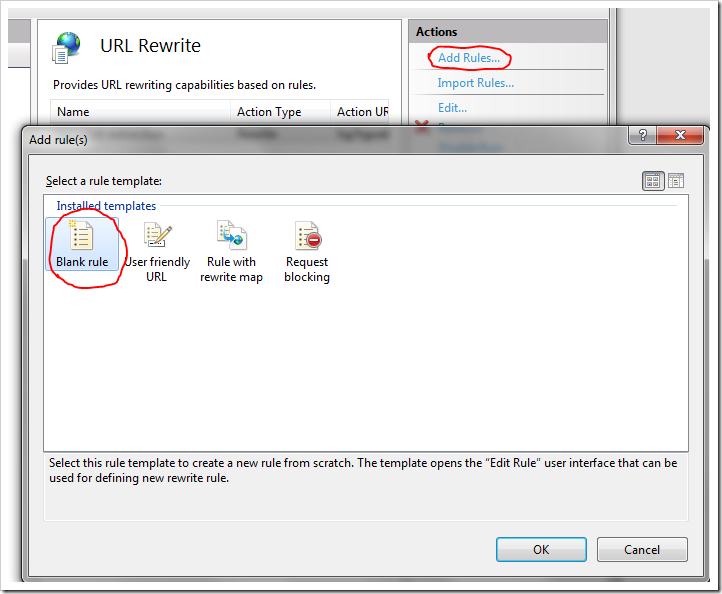
then click on the "Add Rules..." action from the right side panel and select "Blank Rule":
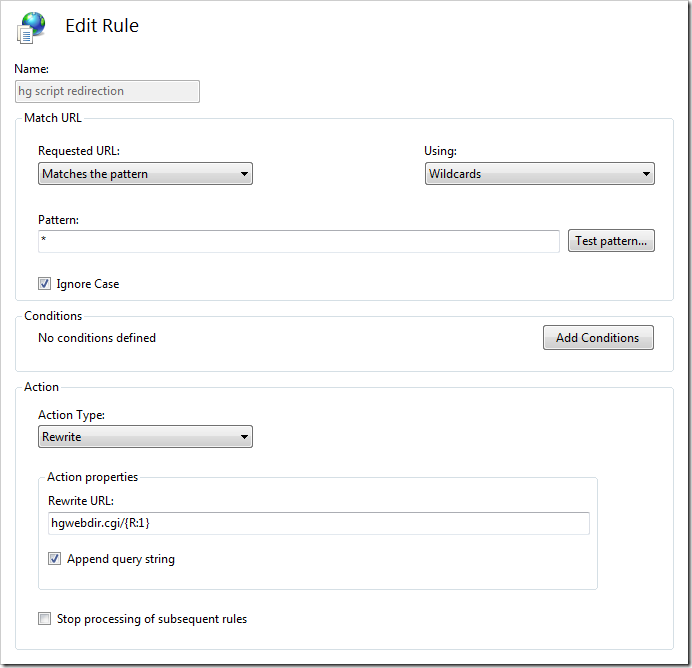
and enter the new rule data as shown in the following picture:
And that should be all.
Now try to navigate to http://localhost/hg with your browser and you should see something like this:

Just remember to setup authentication if you are going to use this server over the internet. I left this to you since you can use any of the standard IIS authentication methods available.